
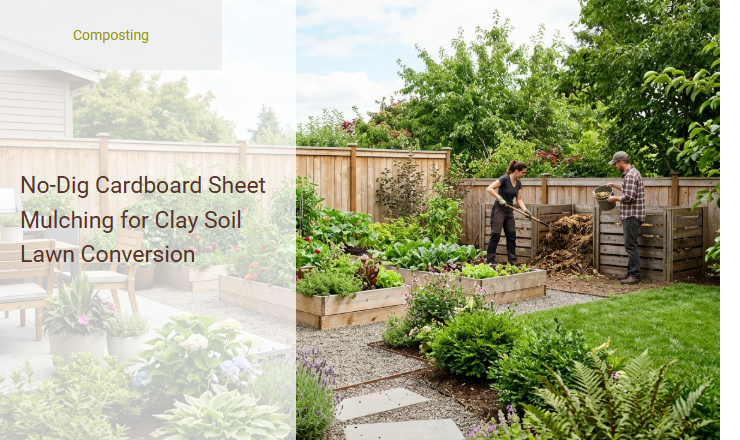
Converting a patchy, sterile lawn anchored in compacted clay soil is notoriously backbreaking work, often leaving gardeners frustrated by the sheer physical strain. Before you reach for a rototiller or a spade, however, it is crucial to understand that traditional excavation actually destroys delicate soil biology and triggers weed germination.
Fortunately, no-dig cardboard sheet mulching offers a regenerative alternative that grants you rich, fertile planting beds without a single shovel-stroke. While this biological transition requires patience-allowing several months for decomposition to occur-the ecological payoff is unmatched. By layering simple organic materials such as recycled cardboard, nitrogen-rich compost, and coarse wood chips, you naturally break up dense clay while building long-term soil structure.
In this guide, we will outline the step-by-step process of execution, material sourcing, and site management to ensure your lawn conversion is a resounding success.
Read also: Cardboard vs Newspaper for Weed Suppression
Transforming Heavy Clay: The Power of No-Dig Sheet Mulching
Clay soil can be a gardener's worst nightmare. Dense, sticky when wet, and rock-hard when dry, it resists traditional digging and suffocates plant roots. However, there is a natural solution that bypasses the backbreaking labor of tilling. No-dig sheet mulching, also known as lasagna gardening, mimics the forest floor by layering organic materials directly over existing lawn. Instead of fighting the clay, this method utilizes biology to convert tough turfgrass into deep, fertile soil. By suffocating the grass and feeding subterranean life, you can transform your yard into a thriving garden ecosystem without disturbing the delicate soil structure.
Essential Materials and Tools for Lawn Conversion
Before you begin your sheet mulching project, gather all the necessary materials and basic tools. Having everything on hand ensures a smooth workflow and a successful soil transformation.
- Thick, clean corrugated cardboard (free of shiny print and plastic tape)
- Nitrogen-rich green materials (fresh grass clippings, manure, or kitchen scraps)
- High-quality compost or rich topsoil
- Arborist woodchips or clean straw for the top cap
- A garden hose with a spray nozzle
- A lawnmower and a utility knife
Step 1: Preparing Your Existing Lawn
Before laying down your organic barriers, you must prepare the site to ensure quick decomposition. The first critical action is to scalp-mow the lawn, cutting the grass as short as physically possible. This weakens the turfgrass and exposes the soil surface. Immediately after mowing, you must thoroughly water the entire area. Surcharging the dry clay with deep moisture is vital; it attracts soil microbes and earthworms upward and ensures that the decomposition process has the hydration it needs to begin instantly.
Step 2: Sourcing and Prepping the Cardboard Barrier
The cardboard layer acts as the primary weed and grass barrier. Look for heavy-duty, plain brown corrugated cardboard boxes, which are easily sourced from local appliance stores or bicycle shops. You must carefully prep each piece to keep your soil healthy and safe.
Remove all plastic packing tape, shipping labels, and metal staples from the cardboard before laying it down. Once stripped clean, pre-soak the cardboard sheets in a wheelbarrow or with a hose until they are completely saturated. Wet cardboard conforms better to the uneven ground and immediately seals moisture into the dry clay soil below.
Step 3: Laying the Cardboard to Smother Weeds
To ensure no grass or stubborn weeds find their way to the surface, you must lay the cardboard with precise overlap. Arrange the saturated sheets directly over the wet, scalped grass, ensuring that every edge overlaps by at least six to eight inches. This generous overlap prevents light from reaching the grass below and blocks weeds from sneaking through the seams as the cardboard shifts and breaks down.

Step 4: Layering the Green Nitrogen-Rich Material
With the weed barrier firmly in place, it is time to feed the soil microbes. The first layer directly above the cardboard should consist of nitrogen-rich green materials. This layer kickstarts the heating and decomposition process, breaking down the tough cardboard from above while drawing beneficial soil life upward.
Excellent options for this nitrogen-rich layer include:
- Fresh grass clippings free of chemical herbicides
- Well-rotted livestock manure (cow, horse, or chicken)
- Fresh kitchen scraps mixed with spent coffee grounds
Step 5: Applying the Compost Layer for Soil Biology
Next, you will apply a generous layer of high-quality compost or rich topsoil. This layer is crucial because it introduces a diverse community of beneficial microbes, bacteria, and fungi directly into the sheet-mulching system. As these microorganisms feast on the organic matter, they migrate downward, naturally loosening the dense clay below. This biological action aerates the heavy soil far more effectively and gently than any mechanical tiller ever could.
Step 6: Capping the System with Woodchip Mulch
The final step in constructing your lasagna bed is to cap the entire system with a thick, protective layer of organic mulch. Spread a layer of woodchips or clean straw several inches deep over the compost. This top layer acts as a protective blanket, retaining moisture, preventing erosion, and suppressing wind-blown weed seeds. It also provides a clean, manicured appearance that makes your new garden bed look instantly professional.
Planting Directly into Your New No-Dig Bed
You do not need to wait months for the layers to break down before you can start growing. You can plant directly into your sheet-mulched bed on day one using simple techniques.
- To transplant starts, push aside the top woodchip layer to expose the compost below.
- Cut an "X" shape through the cardboard barrier using a utility knife if the cardboard has not yet softened.
- Dig a small hole into the soil underneath, insert your transplant, and pack the compost back around the stem.
- To plant seeds, create a shallow trench in the compost layer, sow your seeds, and lightly cover them, keeping the woodchips pulled back until the seedlings emerge.
Long-Term Maintenance and Clay Soil Evolution
During the first year, your primary task is keeping the new bed consistently moist but not waterlogged. As the layers decompose, earthworms will tunnel through the cardboard and transport the rich organic matter deep into the heavy clay below. Over time, this natural biological activity will shatter the dense clay, transforming it into loose, dark, and highly fertile loam. By working with nature rather than fighting it, you will enjoy a high-yielding, low-maintenance garden for years to come.
Summary
Converting a compacted clay lawn into a thriving garden can be a grueling task, but no-dig cardboard sheet mulching offers an effortless, ecological alternative. Also known as lasagna gardening, this method bypasses the need for laborious tilling or digging. Instead, gardeners lay overlapping layers of thick cardboard directly over existing grass and weeds to suffocate them.
Once thoroughly watered, this cardboard base is topped with alternating layers of organic materials, such as compost, shredded leaves, and wood chips. Over time, these materials decompose, inviting earthworms and beneficial microbes to do the heavy lifting. As they tunnel through the soil, they naturally aerate and loosen the dense clay, dramatically improving soil structure, water retention, and nutrient availability. Ultimately, sheet mulching recycles organic waste, suppresses weeds, and transforms stubborn clay into fertile, spongy planting beds with minimal physical strain.
Leave a comment