
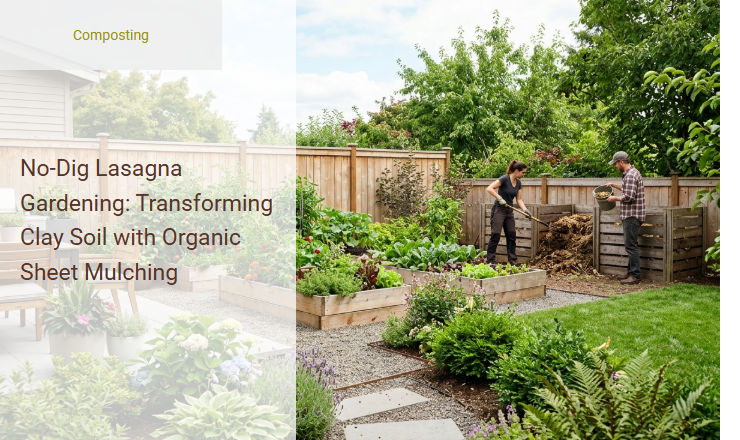
Gardening in heavy clay soil is a notoriously frustrating endeavor, often leaving growers exhausted from battling compacted, poorly draining earth that suffocates delicate root systems. While traditional rototilling seems like the logical remedy, disruptive digging actually destroys vital soil biology and worsens compaction over time. Fortunately, no-dig lasagna gardening bypasses this backbreaking labor entirely, leveraging natural decomposition to build fertile, sponge-like topsoil directly on top of the clay.
Success with this method, however, requires a disciplined approach rather than just piling random yard debris. By systematically layering carbon-rich materials like corrugated cardboard and straw with nitrogen-rich compost and green waste, you initiate a controlled biological breakdown. In this guide, we will detail the step-by-step layering sequence, explain the science of sheet mulching, and provide a clear blueprint to permanently transform your soil structure.
Read also: Lasagna Gardening vs Traditional Tilling for Soil Structure
The Clay Soil Conundrum and the No-Dig Solution
Gardening in heavy, compacted clay soil can feel like working with wet cement. It clings to your boots, snaps shovel handles, and suffocates plant roots during wet seasons while baking into impenetrable brick during dry spells. Traditional wisdom suggests aggressive tilling, but this laborious task often destroys soil structure and invites dormant weed seeds to the surface. Fortunately, there is a better way.
Lasagna gardening, also known as sheet mulching, is a revolutionary, labor-saving alternative to tilling. Instead of fighting the clay, you build upward using layers of organic materials. This simple, no-dig method smothers weeds and transforms tough ground into a thriving, fertile ecosystem without a single scoop of hard digging.
How Lasagna Gardening Works Under the Surface
Beneath the surface of a lasagna bed, a quiet biological revolution takes place. As you layer organic materials, you create a perfect buffet for soil organisms. The moisture retained by these layers attracts earthworms, beneficial bacteria, and fungi. These microscopic workers digest the organic matter, channeling nutrients deep down into the compacted clay below.
"The earthworm is the best natural tiller, aerating the soil far more gently and effectively than any machine."
As the layers decompose, they turn into rich, dark humus. Earthworms burrow through the interface between your lasagna bed and the clay, creating channels that allow air, water, and plant roots to penetrate the once-solid ground. This biological activity naturally restructures the clay, converting it into soft, crumbly soil.
Step 1: Choosing and Preparing Your Site
Selecting the Perfect Location
To get started, find an area that receives adequate sunlight based on what you plan to grow. Most vegetable crops require at least six hours of direct sunlight daily, whereas leafy greens can tolerate partial shade.
Preparing the Ground Without Digging
One of the greatest benefits of sheet mulching is that you do not need to remove existing grass or weeds. Instead, prepare the site with these simple actions:
- Mow the selected area as short as possible to weaken existing vegetation.
- Remove any large woody debris or rocks that could create uneven air pockets.
- Leave the clippings in place to provide an immediate source of nitrogen.
Step 2: Laying the Suppression Base Layer
The first physical layer of your lasagna bed is the weed barrier. This layer acts as a thick shield that blocks light from reaching the grass and weeds below, causing them to break down and enrich the soil.
For this layer, you should use thick, non-glossy cardboard or several layers of black-and-white newspaper. Avoid glossy inserts or heavy plastics that do not decompose.
- Lay the cardboard or newspaper directly over the mowed grass, overlapping the edges by at least six inches to prevent weeds from finding gaps.
- Hose down this base layer thoroughly until it is completely saturated; this water starts the decomposition process and ensures the barrier conforms closely to the clay.
- Wet cardboard also attracts earthworms, which love the moist, dark environment under the paper.
Step 3: Adding the Green Layers (Nitrogen)
The Role of Nitrogen in Decomposition
Nitrogen-rich materials, often referred to as green layers, provide the essential proteins and nutrients that feed the microbes breaking down your bed. These layers act as the fuel that heats up the pile, accelerating decomposition.
Excellent Green Materials
- Fresh grass clippings collected from chemical-free lawns.
- Kitchen vegetable scraps and fruit peels.
- Spent coffee grounds, which are highly acidic but decompose to a neutral pH.
- Green manure, pulled weeds without seed heads, or fresh plant prunings.
Step 4: Adding the Brown Layers (Carbon)
The Role of Carbon in Your Soil
To balance the quick-burning nitrogen, you must include carbon-rich materials, commonly known as brown layers. Carbon provides the structural energy for microbes and helps keep the pile aerated, preventing it from compacting into a smelly, oxygen-deprived mess.
Top Carbon Sources for Your Bed
- Shredded dry autumn leaves, which decompose into magnificent leaf mold.
- Clean wheat straw or hay, ensuring it is free of weed seeds.
- Pine needles, used in moderation so they do not slow decomposition too much.
- Shredded plain cardboard or brown paper bags.
Step 5: Alternating and Building the Stack
Building a lasagna bed is all about ratio and moisture. You want to alternate your green and brown layers to achieve a height of roughly eighteen to twenty-four inches. Over time, this impressive pile will shrink to a fraction of its height as it decomposes into rich soil.
"Aim for a carbon-to-nitrogen ratio of roughly two parts brown to one part green by volume."
As you add each layer, make sure to moisten it lightly with a garden hose. The stack should feel like a wrung-out sponge-damp but not waterlogged. Proper moisture and aeration are the twin engines that keep your composting process active and healthy.
Step 6: Capping with the Planting Medium
The final step in assembling your sheet-mulched bed is adding the top layer, which serves as the immediate home for your plants. This layer is crucial because it allows you to plant seeds and transplants immediately, even before the lower layers have fully decomposed.
This top layer should be roughly two to three inches deep, creating a clean, nutrient-dense surface zone. Use high-quality materials such as:
- Finished compost from your own bin or a local supplier.
- Rich, loose topsoil free of weed seeds.
- Well-rotted animal manure mixed with organic loam.
Planting and Maintaining Your New Lasagna Bed
How to Plant Directly into the Bed
You do not need to wait for the bed to rot down to start gardening. You can plant directly into the freshly capped medium immediately. The roots of your plants will grow downward, following the moisture and nutrients as the lower layers break down.
Step-by-Step Planting and First-Season Maintenance
- To plant transplants, push aside the top layers down to the cardboard, cut an "X" in the cardboard with a knife, plant the root ball directly into the soil beneath, and pull the layers back around the stem.
- Sow seeds directly into the compost cap, keeping the top layer consistently moist until germination.
- Water the entire bed deeply once a week, ensuring the moisture penetrates through all the layers down to the clay.
- Add a light layer of mulch, such as straw or shredded leaves, to the surface as the seasons change to prevent weed seeds from taking root.
The Long-Term Reward: From Hard Clay to Living Soil
As the months pass, the magic of the sheet mulching method becomes clear. What started as a towering stack of waste materials transforms into a rich, dark, living soil. The boundary between your lasagna layers and the stubborn clay below begins to blur as worms drag organic matter downward, opening up deep, nutritious pathways.
Within a year, you will find that the hard clay has softened, morphing into a fertile, crumbly loam. This new ecosystem sustains a healthy soil food web, filled with beneficial fungi and microbes that feed your plants naturally. By working with nature instead of fighting it, you save your back from tilling and gain a highly productive garden that gets better every single season.
Summary
The article "No-Dig Lasagna Gardening: Transforming Clay Soil with Organic Sheet Mulching" introduces an eco-friendly, labor-saving method to convert compacted, stubborn clay soil into a thriving, fertile garden bed. Instead of physically demanding tilling or digging, this sheet mulching technique relies on layering organic materials directly on top of the ground.
The process begins with a foundational layer of cardboard or newspaper to suffocate weeds, followed by alternating layers of nitrogen-rich "green" materials (like grass clippings and kitchen scraps) and carbon-rich "brown" materials (like straw and dry leaves). Over time, these layers decompose, attracting beneficial earthworms and microbes that naturally loosen the compacted clay underneath. This sustainable approach dramatically improves soil structure, enhances water retention, and boosts drainage, creating a nutrient-dense environment for plants to flourish with minimal maintenance.
Leave a comment