
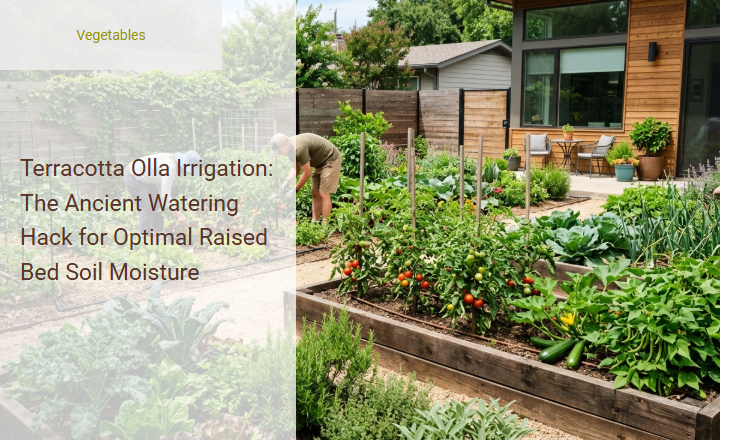
Maintaining consistent soil moisture in raised beds often feels like a losing battle, leaving gardeners trapped in a frustrating cycle of daily watering and rapid soil dehydration. While modern overhead sprinklers and drip lines are the standard go-to methods, they frequently lose significant water to evaporation before it ever reaches the plant roots.
Terracotta olla irrigation bridges this gap, offering an elegant, low-tech subterranean system that slashes water consumption by up to 70% while delivering moisture directly where it is needed most. However, achieving these results requires a basic understanding of soil capillary action and proper vessel placement, especially when supporting water-intensive crops like heirloom tomatoes and summer squash.
In this guide, we will explore the science behind clay-pot irrigation, outline step-by-step installation practices, and provide essential maintenance tips to help you establish a self-regulating, highly efficient watering ecosystem in your garden beds.
Read also: Clay vs Plastic for Container Gardening
Introduction: Reviving an Ancient Watering Method
Terracotta olla irrigation is an age-old watering method that is rapidly becoming the favorite watering hack for modern gardeners. An olla is an unglazed clay pot buried up to its neck in the soil and filled with water. This simple system delivers moisture directly to plant roots deep underground. For raised bed gardeners, this technique is a game-changer. It helps to save water while maintaining optimum soil moisture without the constant need for manual watering.
The History of Olla Irrigation
The use of unglazed clay pots for irrigation is one of the oldest known agricultural technologies. Ancient civilizations across *arid regions* of the globe, including China, North Africa, and the Middle East, utilized this efficient method to grow food in harsh climates. Indigenous agriculturalists in the Americas also embraced these clay vessels to sustain their crops. By relying on *low-tech, highly efficient systems*, these societies successfully cultivated crops in dry landscapes with minimal water resources.
The Science Behind How Ollas Work
The magic of the olla lies in two natural phenomena: clay porosity and soil moisture tension. Terracotta is naturally porous, allowing water to seep through its walls extremely slowly. When the surrounding soil is dry, it exerts a pulling force known as soil moisture tension. This natural suction draws water out of the clay pot. When the soil becomes sufficiently moist, the tension drops, and the water flow stops automatically. This self-regulating system ensures that plants receive water only when they need it, preventing overwatering and runoff.
Why Ollas Are Perfect for Raised Beds
Raised beds dry out much faster than traditional in-ground gardens due to increased drainage and exposure. Ollas solve this problem seamlessly. Here are some of the key benefits of using ollas in raised bed gardening:
- Deep Root Stimulation: Plants grow deep, healthy root systems as they stretch downward to hug the water-rich terracotta surface.
- Reduced Evaporation: Because water is released beneath the soil surface, almost no water is lost to the hot sun or dry air.
- Weed Prevention: The soil surface remains dry, preventing weed seeds from germinating and competing with your crops.
- Water Conservation: Ollas can save up to 70% of the water compared to overhead watering systems, making your garden incredibly eco-friendly.
Selecting the Right Olla for Your Space
Choosing the correct olla size is crucial for ensuring that your plants receive adequate moisture throughout their root zones. The size of your raised bed and the root depth of your chosen crops should dictate the shape and capacity of the vessel you select.
| Olla Capacity | Effective Radius | Best Plant Type |
|---|---|---|
| 2 Quarts | 12 Inches | Shallow-rooted herbs and leafy greens |
| 1 Gallon | 18 Inches | Medium-sized vegetables like bush beans |
| 2 Gallons | 24 Inches | Deep-rooted tomatoes, squash, and peppers |
Step-by-Step Olla Installation Guide
Installing an olla in your raised bed is a straightforward process that takes only a few minutes but pays dividends for the entire growing season.
- Dig a hole in the center of your raised bed that is deep enough to accommodate the entire height of the clay pot up to its neck.
- Gently place the olla into the hole, ensuring the opening sits about two inches above the soil level to prevent dirt from washing inside.
- Backfill the hole with loose, organic soil, pressing it gently around the sides of the clay pot to eliminate air pockets.
- Fill the olla to the top with fresh water and place a lid or saucer over the opening to prevent mosquito breeding and evaporation.
Best Plants and Spacing for Olla Irrigation
While most garden crops appreciate the slow, steady moisture of an olla, certain plants are exceptionally well-suited for this sub-surface watering method. Place your plants in a circle around the buried pot to ensure their root systems can easily reach the moist zone.
- Solanaceous crops like tomatoes, peppers, and eggplants thrive when their deep roots can drink directly from the clay walls.
- Cucurbits including cucumbers, melons, and squash benefit immensely from the consistent moisture, preventing blossom-end rot.
- Leafy greens and herbs like basil, kale, and chard flourish when placed slightly closer to the olla's edge.
Essential Maintenance and Winterization
To keep your irrigation system running at peak performance, a little regular maintenance is required. Over time, soil minerals and fine root hairs can clog the porous clay walls. Periodically check the water level and clean the exterior if you notice water is no longer seeping out efficiently. Most importantly, terracotta is susceptible to cracking when water freezes and expands inside the clay pores. Before the first hard freeze of winter, you must drain the pots completely and lift them out of the ground to store them in a dry, frost-free location until spring.
How to Make a DIY Olla on a Budget
If you want to test this watering method without spending too much, you can easily construct a budget-friendly DIY version using basic hardware store supplies.
- Purchase an unglazed terracotta pot and a matching saucer that fits over the top opening.
- Plug the drainage hole at the bottom of the pot securely using a waterproof silicone glue or a rubber stopper.
- Let the adhesive cure completely according to the package directions to ensure a watertight seal.
- Bury the pot in your garden bed and use the upside-down saucer as a protective lid to keep debris out.
Embrace the Ancient Flow of Smart Gardening
Implementing olla irrigation in your raised beds bridges the gap between ancient wisdom and modern environmental stewardship. By working with nature instead of fighting evaporation, you save precious hours of manual watering while offering your plants the most stable growing environment possible.
"By letting the soil itself dictate when and how much to drink, we restore a natural harmony to our gardens, conserving water while cultivating abundance."
Summary
The article "Terracotta Olla Irrigation: The Ancient Watering Hack for Optimal Raised Bed Soil Moisture" explores a highly efficient, ancient watering method utilizing unglazed clay pots, known as ollas. By burying these terracotta vessels within raised beds and filling them with water, gardeners can establish a self-regulating irrigation system.
Water slowly seeps through the porous clay walls directly into the surrounding soil, guided by the moisture needs of nearby plant roots. This localized, subsurface watering technique drastically reduces water loss from evaporation and runoff, making it an eco-friendly choice for sustainable gardening. Furthermore, olla irrigation encourages plants to develop deep, robust root systems while preventing foliage diseases caused by overhead watering. Simple to install and maintain, this time-tested technique offers a low-tech, cost-effective solution for maintaining optimal soil moisture and boosting crop yields in raised beds.
Leave a comment