
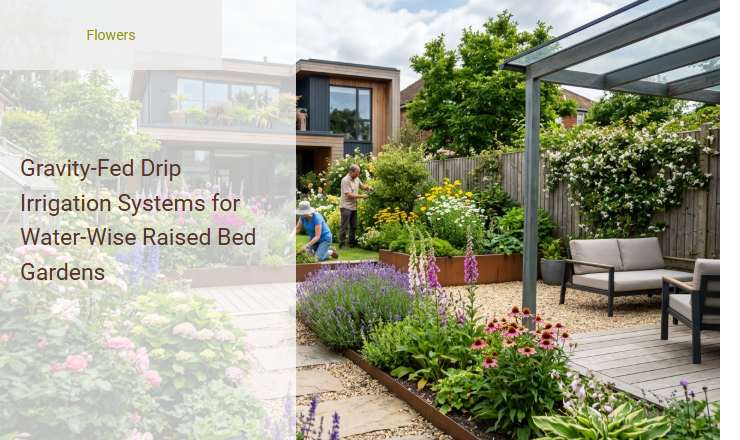
Maintaining consistent soil moisture in raised garden beds often feels like a losing battle against rapid evaporation and water waste. Because elevated planters drain and warm much quicker than traditional in-ground plots, plants frequently suffer from stressful wet-and-dry cycles. Transitioning to a gravity-fed drip irrigation system bridges this gap, offering a low-cost, highly efficient method that delivers precise hydration directly to the root zone using nothing more than natural pressure.
To succeed, however, gardeners must understand the physical constraints of low-pressure systems, particularly how reservoir elevation dictates flow rate. When properly calibrated, this setup provides the steady, deep watering that sensitive crops-such as thirsty heirloom tomatoes and shallow-rooted salad greens-require to maximize yields. This guide will walk you through the essential physics of gravity-fed systems, component selection, and a step-by-step layout design to transform your raised beds into a self-watering oasis.
Read also: Drip vs Overhead Irrigation for Flower Beds
Introduction to Gravity-Fed Drip Irrigation for Raised Beds
Imagine a watering system that works in perfect harmony with nature, using no electricity, no noisy pumps, and zero municipal water pressure. Gravity-fed drip irrigation is a highly efficient irrigation method that leverages the natural force of gravity to deliver water directly to the root zones of your plants. This system is the perfect match for water-wise raised bed gardening, where soil drainage is fast and targeted moisture delivery is crucial. By delivering water slowly and consistently, it minimizes evaporation, prevents soil erosion, and ensures that your precious raised-bed soil remains perfectly hydrated without becoming waterlogged.
The Physics of Gravity-Fed Water Systems
Understanding the physics behind gravity-fed watering is simple yet fundamental to designing an effective layout. The entire system operates on hydrostatic pressure, which is the pressure exerted by a fluid at rest due to the force of gravity. The amount of water pressure, measured in pounds per square inch (PSI), is directly determined by the height of the water column, also known as head height.
For every 2.31 feet that you elevate your water storage tank above the surface of your garden beds, you generate exactly 1 PSI of water pressure. This means that raising a rain barrel 5 feet off the ground will yield approximately 2.16 PSI of pressure. Because gravity systems operate at these ultra-low pressures-typically under 10 PSI-maximizing the physical elevation of your reservoir is the primary way to ensure adequate flow through the system.
Key Advantages for Raised Bed Gardens
Transitioning from traditional hand-watering or overhead sprinklers to a gravity-fed system offers numerous advantages tailored specifically to raised bed environments:
- Unmatched Water Conservation: By dripping water directly onto the soil surface, evaporation losses are virtually eliminated.
- Significant Weed Reduction: Because water is targeted precisely at the plant base, the surrounding soil pathways remain dry, preventing weed seeds from germinating.
- Improved Plant Health: Keeping foliage dry prevents fungal diseases, while deep, slow watering encourages robust, deep root systems.
- Resource Independence: This system functions flawlessly off-grid, utilizing harvested rainwater to sustain your garden.
Mapping and Planning Your Layout
A successful gravity-fed system begins with a clear visual blueprint. When planning your layout, carefully measure the distance between your water source and each raised bed. Keep your main supply line as straight and short as possible to prevent pressure loss caused by friction. Additionally, take note of the elevation difference; if your beds are terraced or of varying heights, place the highest beds closest to the water source to maintain consistent flow. Map out how your distribution tubing will enter each bed, ensuring there are no sharp kinks or sudden climbs that could stall the slow-moving water.

Essential System Components
| Component | Primary Function |
|---|---|
| Water Reservoir | Holds the water supply (typically a rain barrel or IBC tote) and must be elevated to generate pressure. |
| Mainline Tubing | The primary conduit (usually 1/2-inch or 3/4-inch poly tubing) that carries water from the reservoir to the beds. |
| Low-Pressure Filter | Removes fine sediment and organic debris to prevent the drip emitters from clogging. |
| Shut-Off Valve | Allows you to manually control the water flow or isolate specific beds for maintenance. |
| Drip Emitters | Regulate the release of water at the base of the plants, designed specifically for low-PSI flow. |
Understanding Pressure and Flow Requirements
The Challenge of Low-Pressure Systems
Standard home irrigation systems rely on municipal water supplies operating between 40 and 80 PSI. In contrast, gravity systems typically function in the range of 1 to 5 PSI. Because of this drastically reduced pressure, standard pressure-compensating emitters-which require a minimum of 10 to 15 PSI to open their internal diaphragms-will not work. Attempting to use them will result in zero water flow at your plants.
Choosing the Right Emitters and Tubing
To overcome pressure limitations, you must use non-pressure compensating (NPC) emitters, simple drip tape, or laser-drilled drip lines designed specifically for gravity applications. These components allow water to trickle out with minimal resistance. Additionally, utilize larger mainline tubing, such as 1/2-inch or even 3/4-inch, as wider diameters reduce internal friction, allowing your limited gravity-driven pressure to carry water further across your garden beds.
Step-by-Step Installation Guide
- Elevate the Reservoir: Position your water barrel or storage tank on a sturdy platform elevated at least 3 to 5 feet above the top surface of your highest raised bed to establish baseline pressure.
- Install the Bulkhead and Valve: Connect a heavy-duty bulkhead fitting to the bottom of the reservoir, followed by a manual shut-off valve to control the system's output.
- Attach the Filtration System: Connect a high-quality disc or screen filter directly downstream from the shut-off valve to protect your lines from algae and sediment.
- Lay the Mainline Tubing: Route your 1/2-inch poly tubing from the filter down to the raised beds, securing it to the ground with stakes to prevent shifting.
- Install Distribution Lines in Beds: Run 1/4-inch distribution tubing or gravity-compatible drip lines across the surface of the raised beds, snaking them close to plant roots.
- Insert Gravity Emitters: Punch holes into the distribution lines and insert non-pressure-compensating emitters, or connect drip emitters at targeted plant locations.
- Flush and Cap the Lines: Open the main valve to flush out any installation debris, then seal the ends of the tubing with figure-eight end clamps.
Crucial Filtration and Water Quality Needs
Because gravity-fed systems operate at exceptionally low pressures, they are highly susceptible to blockage. Even a tiny particle of organic matter or sediment can completely stop the flow of water from a low-pressure emitter. When utilizing rainwater harvesting systems, debris such as roof grit, pollen, leaves, and algae can easily contaminate your reservoir. Implementing robust filtration is an absolute necessity to maintain uniform water flow throughout the season.
For gravity systems, a 120 to 150-mesh screen filter or a disc filter is highly recommended. Disc filters are particularly effective for water sourced from rain barrels because they trap organic matter within a series of grooved plastic discs, making them easy to clean and highly resistant to premature clogging.
System Maintenance and Winterization
In-Season Maintenance Routines
To keep your low-pressure system running efficiently throughout the growing season, establish a few quick habits:
- Check and clean the filter screen every two to four weeks, especially during peak summer when algae growth is rapid.
- Walk the lines weekly to inspect for clogged emitters, kinked tubing, or leaks caused by garden tools.
- Flush the entire system once a month by opening the end caps to wash out any fine sediment that managed to bypass the filter.
Winterization Protocol
Leaving water in your irrigation lines during freezing temperatures will cause the plastic to crack and split. Follow these steps before the first freeze:
- Completely drain your water reservoir to prevent freeze damage to the tank and valves.
- Disconnect the filter and main shut-off valves and store them in a protected, dry environment.
- Open the end caps of all distribution lines and blow or drain out any residual water trapped inside the tubing.
Cultivating a Sustainable Future
Embracing gravity-fed drip irrigation is more than just an efficient way to water your garden; it is a profound commitment to sustainable living. By reducing your reliance on treated municipal water and eliminating energy-intensive pumps, you cultivate a resilient ecosystem right in your own backyard. Your raised beds will flourish under the steady, gentle cadence of natural, gravity-driven hydration, producing bountiful harvests with a remarkably light ecological footprint.
"To garden with gravity is to work with nature rather than against it, transforming every drop of rain into a legacy of growth and renewal."
Summary
Gravity-fed drip irrigation systems offer an eco-friendly, highly efficient watering solution tailored specifically for raised bed gardens. By leveraging natural gravity instead of relying on electricity or pressurized municipal water, these systems deliver moisture directly to plant roots through a low-pressure network of tubing and emitters. This targeted delivery significantly minimizes water loss from evaporation and runoff, promoting deep, healthy root development while keeping foliage dry to prevent fungal diseases.
Particularly beneficial for raised beds, gravity-fed setups are cost-effective, easy to install, and highly customizable. Simply elevating a water source-such as a rain barrel or storage tank-creates the gentle pressure needed to sustain consistent soil moisture. Ultimately, adopting this water-wise irrigation method allows home gardeners to conserve precious water resources, reduce utility costs, and cultivate thriving, abundant harvests with minimal manual effort and maximum environmental sustainability.
Leave a comment