
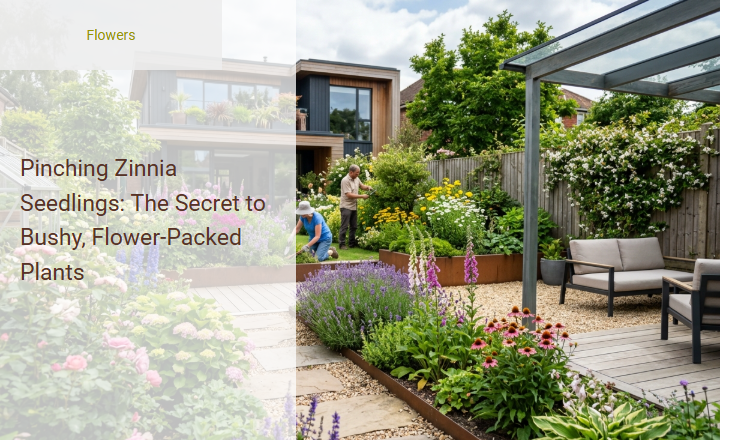
Watching your carefully nurtured zinnia seedlings grow tall, spindly, and sparse is a frustrating yet common disappointment for many gardeners. While it is natural to celebrate rapid upward growth, unchecked vertical stretch actually limits your plant's potential, often resulting in top-heavy stems that produce only a single, vulnerable terminal bloom.
Fortunately, implementing the technique of "pinching" forces the seedling to redirect its growth hormones. This simple, hands-on intervention rewards you with a dramatically increased yield of vibrant flowers without requiring expensive fertilizers. However, proper execution requires strict adherence to timing; pinching too early can permanently stunt development. For optimal results, you must wait until the seedling reaches about 3 to 4 inches in height and has established exactly three to four sets of true leaves as structural proof of readiness.
This article will guide you through the precise mechanics of pinching, including where to cut, when to act, and how to care for your newly branched zinnias for a spectacular, season-long display.
Read also: Direct Sowing vs Indoor Starting for Zinnias
Introduction to the Magic of Pinching Zinnias
Zinnias are the undisputed champions of the summer garden, offering a kaleidoscope of vibrant colors that last from early summer right up until the first frost. However, many gardeners who grow these beauties from seed find themselves with tall, single-stemmed, "leggy" plants that produce only one or two flowers at a time. The secret to transforming these sparse plants into lush, bushy, flower-packed garden showstoppers lies in a simple, almost counterintuitive gardening technique called pinching.
Pinching involves removing the main growing tip of your young zinnia seedlings. While it might feel painful to snip off the top of a healthy young plant, this small act of intervention triggers a remarkable transformation. By doing so, you encourage the plant to branch out, resulting in dramatically increased bloom yields, sturdier stems that can withstand summer storms, and a vastly extended flowering season that will keep your garden bursting with color for months on end.
Understanding the Science Behind Pinching
To understand why pinching works so beautifully, we have to look at how plants distribute their growth hormones. In their natural state, zinnias exhibit a phenomenon known as apical dominance. This is a botanical growth pattern where the central stem grows more vigorously than the side branches, dictated by a hormone called auxin produced in the terminal bud. The primary goal of apical dominance is to help the plant climb as quickly as possible toward the sunlight, suppressing the development of lateral shoots below.
When you pinch off the main growing tip, you disrupt this hormonal monopoly. By physically removing the source of auxin, you release the dormant lateral buds situated further down the stem from their chemical suppression. The zinnia plant immediately redirects its life force, sugars, and nutrients outward to these side nodes. Within days, those sleepy side buds wake up and develop into strong, productive new branches, effectively doubling or tripling the plant's future blooming potential.
The Benefits of Pinching Zinnias
While allowing a zinnia to grow naturally might seem like the easiest path, taking a few seconds to pinch your plants yields extraordinary rewards for your cutting garden and landscape aesthetics:
- Exponentially More Blooms: Instead of one solitary flower at the top of a single stalk, a pinched zinnia produces multiple branches, each capable of developing its own gorgeous flower head.
- Sturdier, Wind-Resistant Structures: Single-stemmed zinnias are top-heavy and easily fall over during heavy summer rainstorms. Pinched plants are shorter, bushier, and far more self-supporting.
- Continuous, Extended Harvests: Because the lateral stems develop at slightly staggered intervals, you will enjoy a continuous, rolling cycle of fresh blooms rather than one sudden, short-lived flush.
- Improved Air Circulation: A multi-branched, well-spaced plant structure allows better airflow through the foliage, reducing the risk of powdery mildew-a common nemesis of summer zinnias.
When is the Best Time to Pinch?
Timing is everything when it comes to pinching. If you pinch too early, the seedling won't have a strong enough root system or sufficient leaf surface area to recover quickly. If you pinch too late, you will have wasted the plant's valuable energy on a thick main stem that you end up discarding, delaying your first round of flowers.
The ideal window for pinching is when your zinnia seedlings are between 3 to 4 inches tall. At this stage, the young plant should have developed 3 to 4 pairs of true leaves (excluding the initial smooth seed leaves, or cotyledons). If you look closely at the leaf junctions (nodes) along the stem of a seedling this size, you will already see tiny green nubs preparing to grow-this is your cue that the plant is perfectly primed for a pinch.
Essential Tools for the Job
Pinching can technically be done with your bare fingernails, but using dedicated, sterilized tools ensures a clean cut that heals rapidly and prevents the introduction of fungal or bacterial pathogens into the open plant tissue. Here is how to prepare your toolkit before heading out to the garden bed:
- Acquire fine-tipped micro-snips: Use specialized floral snips or sharp bypass pruning shears. Dull blades can crush the delicate seedling stems, leaving jagged wounds that are highly susceptible to rot.
- Sterilize with rubbing alcohol: Wipe down the blades of your snips with a cotton ball soaked in 70% isopropyl rubbing alcohol or dip them directly into the solution. This neutralizes any lingering garden pathogens.
- Prepare a sanitizing cloth: Keep a clean rag handy to wipe down your shears as you move between different varieties of zinnias, ensuring you do not cross-contaminate plants.
Step-by-Step Guide to Pinching Your Zinnias
- Inspect the seedling: Confirm your zinnia seedling has reached the correct height and has at least three sets of true leaves growing strongly along its central stem.
- Locate the top set of leaves: Trace the main stem upward and identify the topmost node where a set of leaves joins the stem, just below the very tip of new growth.
- Position your snips: Place your sterilized pruning shears directly above the selected leaf node. You want to execute a
clean cut just above the topmost leaf pair, leaving the node itself completely intact. - Make the cut: Snip cleanly through the stem. Avoid leaving too much empty stem above the node, as
excess stub tissue will wither, turn brown, and invite disease. - Discard the tip: Remove the severed growing tip. If you pinched early enough, this tip can be composted; if you pinched slightly later, you can try rooting this cutting in moist soil to grow a whole new zinnia!
What to Expect After the Pinch
Immediately after the pinch, your zinnia might look a bit sad and bare. Do not panic; this is a completely normal reaction. Within 24 to 48 hours, the plant's vascular system will adjust its internal pressure and hormone distribution, directing all of its energy downward to the remaining leaf nodes.
Within three to five days, you will notice the tiny green nubs at the leaf joints beginning to swell and elongate. By the end of the first week, these nubs will have transformed into distinct, rapid-growing side branches. In two to three weeks, your single-stemmed seedling will have fully evolved into a balanced, multi-branched plant that is preparing to set a bounty of flower buds across all of its new limbs.
Gardener's Tip: It can be nerve-wracking to cut off healthy growth, but remember that you are sacrificing one single early bloom to secure a harvest of dozens of flowers later. Patience at this stage pays off immensely!
Common Pinching Mistakes to Avoid
While pinching is a straightforward garden task, making a few common missteps can set your zinnias back or stunt their overall growth. Keep these pitfalls in mind to ensure your pinching session goes smoothly:
- Pinching way too late: Waiting until the plant is tall and already has a prominent flower bud. Cutting back a thick, mature stem wastes a tremendous amount of the plant's resources and delays blooming.
- Cutting too low on the stem: Snipping the plant down to its base leaves below the active nodes. Always ensure you leave at least two to three healthy sets of leaves on the plant so it has enough foliage to photosynthesize and recover.
- Using dull, dirty shears: Tearing or crushing the stems rather than making a clean, sharp slice. This leaves jagged edges that are highly prone to fungal spores like botrytis.
- Pinching water-stressed plants: Pinching during a heatwave or when the soil is bone-dry. Always water your zinnias well the day before pinching to make sure they are fully hydrated and resilient.
Post-Pinch Care for Optimal Growth
Once you have pinched your zinnias, supporting their rapid recovery and subsequent branching is critical. Ensure your plants receive a minimum of six to eight hours of direct sunlight daily; sunlight is the primary fuel they need to drive photosynthesis and push out that vigorous new lateral growth. Maintain a consistent watering schedule, aiming to water deeply at the base of the plant to keep the roots hydrated while keeping the foliage dry to prevent disease.
Avoid overhead watering, which can splash soil-borne pathogens onto the fresh cuts. Instead, utilize drip irrigation or a targeted watering can to keep the soil consistently damp but not waterlogged as the new shoots establish themselves.
Enjoying Your Abundant Zinnia Harvest
As the summer heat builds, the rewards of your early intervention will become spectacularly clear. Your garden beds will be filled with robust, bushy zinnia plants heavily adorned with an abundance of vibrant, multi-layered flowers. Because you pinched them, these plants will stand strong against summer winds and continue to produce an endless supply of long-stemmed blooms perfect for bringing indoors to fill your vases.
Grab your sterilized snips, head out to your garden patch, and confidently pinch back those eager young seedlings. This simple act of garden care unlocks the true, spectacular potential of your plants, paving the way for a breathtakingly vibrant, flower-packed garden paradise that will keep your home and landscape filled with color all season long.
Summary
Pinching zinnia seedlings is a simple yet transformative gardening technique that encourages single-stemmed, leggy plants to develop into robust, bushy, and highly productive specimens. By snipping off the top growing tip of a young zinnia, gardeners stimulate the plant to redirect its energy into producing multiple lateral branches. This process not only creates a sturdier structure capable of withstanding harsh weather but also multiplies the number of blooming stems, resulting in a dramatic increase in colorful flowers.
For the best results, pinch zinnias when the seedlings are about 8 to 12 inches tall and have developed three to four sets of true leaves. Using clean shears or fingers, simply snip the central stem just above a leaf node. This quick and easy garden task is the ultimate secret to enjoying a lush, flower-packed zinnia display all summer long.
Leave a comment