
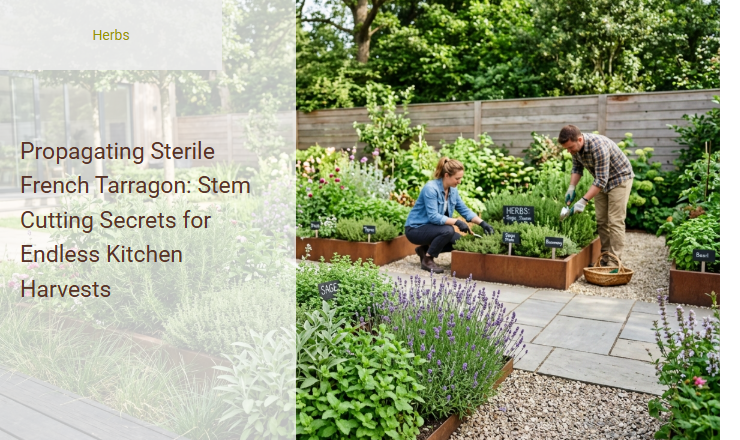
For many culinary gardeners, cultivating true French tarragon (Artemisia dracunculus 'Sativa') is a source of immense frustration. Because this highly prized herb is completely sterile, it cannot be grown from seed, often leaving growers dependent on expensive and hard-to-find nursery starts each spring.
To overcome this limitation, we must first understand the unique vegetative biology of the plant. Mastering stem propagation not only grants you culinary independence but also secures an endless, cost-free supply of this aromatic herb for your kitchen.
However, success requires adhering to strict botanical guidelines; unlike resilient mint, tarragon cuttings demand precise moisture control and specific warmth to prevent rot. Utilizing healthy, semi-ripe spring shoots and applying a liquid kelp or rooting hormone solution provides the concrete biological foundation needed for success.
In this guide, we will outline the exact steps to harvest cuttings, prepare the ideal rooting medium, and successfully transition your new clones into thriving garden plants.
Read also: French Tarragon vs Russian Tarragon for Culinary Flavor
The Mystery of French Tarragon: Why You Must Propagate from Cuttings
French tarragon is a legendary herb in the culinary world, famous for its delicate anise flavor that elevates classic French sauces and chicken dishes. However, there is a fascinating botanical mystery behind this prized plant: true French tarragon is sterile. It rarely flowers, and when it does, it produces no viable seeds. This means any packet of "tarragon seeds" you find in a garden center is actually Russian tarragon, a different variety that lacks the rich, sweet flavor profile of its French counterpart.
To secure a lifetime supply of the authentic culinary herb, you must learn the art of propagation. By using stem cuttings, you bypass the seed issue entirely, cloning your original plant to ensure identical flavor and aroma in every new pot. Mastering this technique guarantees an endless kitchen supply of one of gastronomy's finest ingredients.
Timing Your Harvest: The Golden Window for Stem Cuttings
Timing is everything when it comes to successful propagation. To give your French tarragon cuttings the absolute best chance of survival, you must harvest them during their golden window. This period occurs in late spring to early summer, when the parent plant is entering a phase of rapid, active growth.
During this time, the stems are in a semi-ripe state. They are flexible yet possess enough cellular maturity to transition from producing leaves to producing roots. Choosing stems at this developmental stage is crucial because younger, too-soft shoots tend to rot easily, while older, woody stems root much more slowly, if at all.
Gathering Your Propagation Toolkit
Before making any cuts, set up your workspace with the appropriate materials. Having the right tools on hand ensures a clean, fast process that minimizes shock to both the parent plant and the cutting.
- Sterilized pruning shears or a sharp knife to ensure clean, precise cuts.
- Lightweight potting mix consisting of peat moss and perlite for optimal drainage.
- Rooting hormone to stimulate rapid and healthy root development.
- Small pots with excellent drainage holes to house the newly planted stems.
Choosing the Ultimate Parent Plant
The success of your new tarragon crop begins with the health of the mother plant. To obtain strong, resilient clones, you must select an established French tarragon plant that exhibits robust vitality and active growth. Avoid any plants that show signs of pests, wilting, yellowing leaves, or fungal diseases, as these issues can easily transfer to the cuttings and ruin your chances of success.
When inspecting the mother plant, look specifically for non-flowering stems. Flowering diverts a plant's energy away from root development and into blossom production. Choosing stems without flowers ensures that all the plant's metabolic energy is channeled into forming strong, healthy root systems quickly once the cutting is placed in the soil.
The Perfect Cut: Step-by-Step Harvesting
Harvesting the cutting requires precision and care to protect both the mother plant and the future clone. Follow this exact methodology to secure a high-quality cutting:
- Identify a healthy, non-flowering stem that is active and semi-ripe.
- Measure a length of 4 to 6 inches from the growing tip downward.
- Locate a leaf node, which is the point where leaves emerge from the stem.
- Use sterilized shears to make a clean cut at a 45-degree angle just below the selected node.
- Place the freshly cut stem immediately into a container of cool water to keep it hydrated and prevent wilting.
Preparing Cuttings for Root Development
Once you have harvested your stems, you must prepare them to focus entirely on root formation. To do this, gently strip the leaves from the bottom two inches of each cutting. Stripping these leaves is essential because it exposes the leaf nodes, which are the exact areas where the new root systems will erupt. Removing the lower foliage also ensures that no leaves are buried in the soil, which would otherwise rot and introduce harmful bacteria.
Next, you should trim the remaining leaves at the top. If the cutting has too much foliage, it will lose precious moisture through transpiration faster than it can absorb it. Trimming the upper leaves by half reduces this water loss and encourages the plant to direct its energy downward, signaling that it is time to establish a strong foundation of roots.
Igniting Root Growth: Soil Preparation and Planting
With your cuttings prepared, it is time to introduce them to their growing medium. Start by moistening your lightweight potting mix thoroughly so that it is damp but not waterlogged. To give your tarragon cuttings a strong head start, dip the exposed bottom nodes of each stem into rooting hormone powder or liquid, ensuring a light, even coat over the cut area.
To plant the cutting without wiping away the hormone, use the "dibble" method. Use a pencil or a small stick to poke a hole into the pre-moistened potting mix first. Gently insert the stem into the hole, then firmly press the soil around the base to ensure solid contact and keep the cutting upright. This simple technique keeps the rooting stimulant intact where it is needed most.
Creating the Ideal Microclimate for New Roots
Because the cuttings do not yet have roots, they must absorb moisture from the air to survive. You can facilitate this by building a humid greenhouse-like environment. Cover your pots with a clear plastic bag, plastic wrap, or a humidity dome. Be sure to prop up the plastic so it does not touch the foliage, as standing water on the leaves can lead to mold and decay.
Place the pots in a warm, bright area that receives plenty of indirect sunlight. Direct, harsh sunlight will overheat the small greenhouse and scorch the delicate leaves. Keep the soil consistently moist but never soggy. Striking this balance is the key to maintaining a healthy, high-humidity microclimate where new roots can thrive and expand.
Spotting Success: From Rooted Cutting to New Plant
Within three to four weeks, your French tarragon cuttings should begin developing their own root systems. You can easily test for success by giving the base of the stems a very gentle upward tug. If you feel slight resistance, it means roots have successfully anchored themselves into the soil mix. At this stage, you can remove the humidity dome permanently.
Before moving your new plants to their final outdoor home, they must undergo a process called hardening off. Gradually expose the young plants to outdoor conditions over the course of a week, letting them adapt to direct sunlight and wind. Once acclimated, they are ready for transplanting into larger pots or garden beds where they can continue to mature.
Nurturing Your New Herbs for Endless Kitchen Harvests
Now that your French tarragon clones are established, ongoing care is the secret to a bounty of flavorful leaves. Position your mature herbs in a spot that receives at least six hours of sunlight daily, and plant them in well-draining soil, as tarragon hates wet feet. Water them deeply only when the top inch of soil feels dry to the touch.
To keep your plants productive and prevent them from becoming leggy, use the pinching technique. Regularly pinch off the growing tips of the stems. This simple action stimulates lateral branching, turning your tarragon into a bushier, more productive herb. With regular maintenance, you will enjoy a continuous, aromatic harvest of true French tarragon, ready to elevate every dish you prepare.
Summary
Unlike its easily grown but flavorless Russian cousin, authentic French tarragon is sterile and cannot be propagated from seed. This comprehensive guide unlocks the professional secrets to successfully propagating this highly prized culinary herb using stem cuttings, ensuring an endless, cost-free supply for your kitchen.
The propagation process begins in spring or early summer by taking three- to six-inch cuttings from healthy, non-flowering shoots. By dipping the cut ends in rooting hormone and planting them in a light, well-draining, soil-less potting mix, gardeners can stimulate rapid root development. Keeping the cuttings under a humidity dome and placing them in bright, indirect sunlight are critical steps for survival. Within a few weeks, these cuttings will establish robust root systems, ready to be transplanted into your garden or windowsill pots for a lifetime of aromatic, anise-flavored harvests.
Leave a comment