
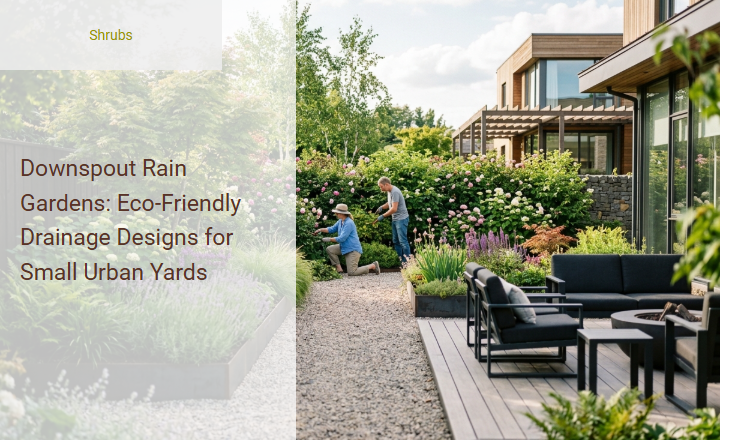
For urban homeowners with limited outdoor space, managing heavy downspout runoff is a persistent frustration, often leading to waterlogged soil, eroded walkways, or basement dampness. While municipal storm systems are increasingly overwhelmed, simply routing this water onto paved surfaces is no longer a viable option.
Fortunately, downspout rain gardens offer a functional alternative, transforming destructive runoff into a lush, self-sustaining landscape feature that boosts local biodiversity. However, these systems are not merely shallow mud pits; they require precise soil engineering and infiltration testing to function correctly without creating standing water hazards. By combining strategic gravel basins with deep-rooted native species like Lobelia cardinalis (Cardinal Flower), you can safely control high-volume flows.
In this article, we will break down the essential engineering principles, site selection criteria, and planting schemes necessary to build an efficient rain garden within a compact urban footprint.
Read also: Ninebark vs Elderberry for Wet Soils
Rethinking Urban Runoff: The Power of Downspout Rain Gardens
In modern cities and suburban neighborhoods, concrete, asphalt, and rooftops dominate the landscape. This abundance of impervious surfaces prevents rainwater from absorbing naturally into the ground. Instead, heavy storms trigger massive volumes of stormwater runoff, which rushes off roofs, collects pollutants from streets, and overwhelms municipal sewer systems. Traditional downspouts exacerbate this issue by channeling water directly off properties and onto paved driveways or roads, bypassing the soil entirely.
An elegant, eco-friendly solution to this modern challenge is the installation of a downspout rain garden. By strategically redirecting roof runoff into a specialized, shallow landscape depression, homeowners can transform a potential flooding hazard into a thriving ecological asset. These gardens act as natural sponges, filtering out impurities and allowing water to gently recharge the local aquifer while beautifying compact urban yards.
Understanding the Anatomy of a Downspout Rain Garden
A downspout rain garden is a engineered, shallow depression planted with deep-rooted native vegetation. Unlike a standard flower bed, which is typically mounded or level with the surrounding lawn, a rain garden is designed to act as a temporary bowl that captures, holds, and infiltrates water within a 24-to-48-hour window. This temporary storage prevents standing water from becoming a breeding ground for mosquitoes while giving the earth time to absorb the runoff.
To understand how this system functions, it helps to look at its core structural components:
- The Ponding Area: The shallow, depressed center of the garden, typically 4 to 8 inches deep, designed to temporarily hold incoming stormwater.
- The Soil Matrix: A highly permeable, engineered soil mixture that replaces native heavy clay to facilitate rapid water infiltration and filtration.
- The Mulch Layer: A thick layer of coarse, shredded hardwood mulch that keeps the soil moist, prevents erosion, filters heavy metals, and traps sediment.
- The Berm: A gently sloped earthen barrier constructed on the downhill side of the garden to contain water during heavy downpours.
Site Selection: Finding the Perfect Spot in a Small Yard
In a small urban yard, space is at a premium, making careful site selection vital for both garden health and structural safety. The goal is to place the rain garden in a location where it can naturally intercept water flowing from a gutter downspout, utilizing the natural slope of the land without creating water damage hazards for your home or your neighbors.
Ideally, select a spot that receives full to partial sunlight to encourage healthy plant growth and promote evaporation. Avoid placing the garden over buried utility lines, directly under the drip line of mature trees, or in areas where water already pools naturally-this indicates poorly draining soil that will fail to infiltrate new runoff. A gentle slope of 1% to 5% is ideal for guiding the water from your downspout to the garden basin.
Calculating the Size and Depth for Compact Spaces
To design an effective rain garden, you must size the basin to handle the volume of water coming off your roof. A garden that is too small will constantly overflow, while one that is too large may be unnecessarily difficult to excavate in a compact yard.
To calculate the ideal footprint, you must first determine the drainage area, which is the specific portion of the roof that feeds into the chosen downspout. You can estimate this by multiplying the length and width of the portion of the house draining to that gutter. Once you have this area, you apply a sizing factor based on your soil type and the target ponding depth (typically 6 inches). For sandy soils, the garden size should be roughly 10% to 15% of the drainage area; for silty or clay soils, it should be 20% to 30% of the drainage area to compensate for slower infiltration rates.
Directing the Flow: Connecting Your Downspout
Once you have selected and sized your garden, you must choose a reliable method to route the stormwater from your gutter's downspout to the entry point of the rain garden. This connection must withstand high-velocity water flows during torrential downpours without eroding your lawn or the garden entry point.
There are two primary methods for directing this flow. The first is an underground PVC or flexible corrugated drainage pipe, which keeps the lawn surface clear but requires trenching. The second is an above-ground rock channel, which mimics a natural dry creek bed. This decorative option utilizes river rock and cobble to slow down the water as it travels, adding a rustic aesthetic element to small yards. At the point where the water enters the garden, a splash block or cluster of large stones should be placed to disperse the water's energy and prevent soil washout.

The Ultimate Soil Mix Recipe for Rapid Drainage
A successful rain garden relies heavily on its soil. Standard garden soil or native clay will pack down tightly, trapping water on the surface and drowning plant roots. To ensure rapid drainage and optimal nutrient filtration, you must excavate the native soil and replace it with a specialized rain garden soil matrix.
Use the following ratio to mix your custom, fast-draining soil:
- 50% to 60% Coarse Sand: This forms the backbone of the mix, ensuring that water drains quickly and does not pool on the surface for more than a couple of days.
- 20% to 30% Topsoil: Native sandy loam or quality topsoil provides structural body and essential minerals for plant health.
- 20% to 30% Organic Compost: Well-aged leaf compost or yard waste compost retains enough moisture to support plants during dry spells while filtering pollutants out of the runoff.
Plant Selection: Choosing Deep-Rooted Native Species
The plants in your rain garden must be tough, adaptable survivors. They need to tolerate "wet feet"-temporary submersion in water during heavy rains-while also surviving prolonged dry periods between storms without supplemental watering. Native plants are ideally suited for this task because they have deep, robust root systems that open up channels in the soil, helping water infiltrate even deeper over time.
To maximize success in a small space, organize your planting plan into three distinct moisture tolerance zones:
| Garden Zone | Moisture Level | Recommended Native Species |
|---|---|---|
| Wet Zone (Bottom Basin) | Frequently wet; holds water longest | Blue Flag Iris, Swamp Milkweed, Cardinal Flower |
| Transition Zone (Slopes) | Occasionally wet; drains quickly | Purple Coneflower, Black-Eyed Susan, Great Blue Lobelia |
| Dry Edge (Berm & Borders) | Rarely wet; dry soil conditions | Switchgrass, Little Bluestem, Purple Prairie Clover |
Managing Excess: Designing the Overflow Outlet
While rain gardens are designed to handle typical rain events, a severe, historic storm will occasionally drop more water than the basin can hold. Failing to plan for this excess can lead to uncontrolled flooding, erosion of your berm, or water flowing back toward your home's foundation.
To safely handle surcharge conditions, you must incorporate an overflow outlet into your design. This is typically a slightly depressed notch in the downhill berm, lined with heavy, durable stones to prevent erosion. This notch acts as a spillway, directing the excess water along a safe pathway toward a municipal storm drain or another safe vegetated area. Always ensure that your overflow pathway does not dump water directly onto a neighbor's property or close to another structural foundation, as this is a critical safety consideration.
Execution: A Step-by-Step Construction Guide
Building a downspout rain garden is an excellent weekend project. By breaking down the labor-intensive process into systematic phases, you can complete the excavation, soil replacement, and planting with basic gardening tools.
- Mark and Utility Check: Outline the garden shape with a garden hose or spray paint. Call your local utility locate service to ensure no underground lines run through the digging zone.
- Excavation: Dig out the basin to a depth of 18 to 24 inches, keeping the bottom flat and level. Use the excavated soil to build a compacted berm on the downhill side.
- Soil Replacement: Fill the excavated area with your prepared custom soil mix, leaving a 6-inch depression from the surrounding lawn level to serve as your ponding area.
- Inflow Connection: Lay your pipe or construct the stone channel from the downspout to the basin entrance, securing the entry point with heavy river rocks.
- Planting: Arrange your native plants according to their moisture zones, gently loosening their root balls before placing them in the soil.
- Mulching: Apply a uniform, 2-to-3-inch layer of double-shredded hardwood mulch over the entire garden bed, keeping it clear of the immediate plant stems.
Seasonal Maintenance and Troubleshooting
During the first year, your primary focus will be on watering the young native plants to help them establish their deep root networks. Once established, native species require very little supplemental watering, save for extreme drought conditions. Apply fresh shredded hardwood mulch each spring to maintain a solid barrier against weeds and to continue filtering sediment from the incoming roof water.
Periodically inspect the inlet and overflow areas for accumulated leaf litter, grass clippings, or sediment, clearing away debris to ensure water flows smoothly. If you notice that water sits in your garden for more than 48 hours after a storm, the soil may be compacted or clogged with fine silt. You can easily fix this by aeration, mixing in additional coarse sand, or using a garden fork to loosen the top layer of soil to restore rapid infiltration rates.
Summary
"Downspout Rain Gardens: Eco-Friendly Drainage Designs for Small Urban Yards" explores how urban homeowners can manage stormwater runoff sustainably. In compact city lots, heavy rainfall often overwhelms municipal systems and carries pollutants into local waterways. Downspout rain gardens offer an elegant solution by redirecting rainwater from roof gutters directly into a specially designed, shallow planted depression.
This system utilizes native plants, deep root networks, and absorbent soil mixtures to naturally filter toxins, prevent soil erosion, and facilitate groundwater recharge. Specifically tailored for small spaces, these gardens convert functional drainage into attractive landscape features that support local biodiversity, attract pollinators, and mitigate localized urban flooding. By implementing these eco-friendly designs, urban residents can play an active role in water conservation while enhancing the aesthetic and ecological value of their limited outdoor spaces.
Leave a comment