
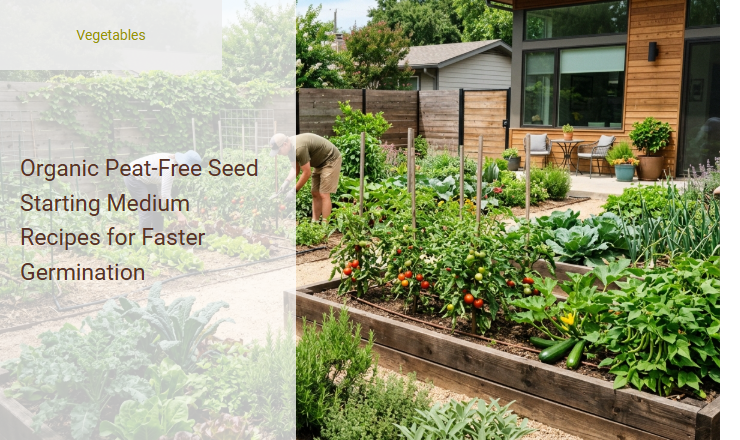
For many growers, watching carefully sown seeds succumb to damping-off or fail to sprout at all is a deeply frustrating roadblock to a successful season. Traditionally, peat moss has been the default base for starting seeds, yet its extraction degrades vital wetland ecosystems, forcing modern horticulturists to seek sustainable alternatives.
Transitioning to peat-free mediums not only aligns with environmental stewardship but actually accelerates root development and boosts overall germination success. However, achieving these results requires understanding how various organic components interact; peat-free mixes are not one-size-fits-all and demand careful moisture management to prevent compaction.
Utilizing structural materials like coconut coir for water retention, alongside perlite for aeration and leaf mold for natural biological activity, creates a balanced, pathogen-resistant environment. Below, we outline three distinct, field-tested peat-free recipes with precise ratios to help you optimize your seed-starting setup this season.
Read also: Peat vs Coco Coir for Seed Starting
Why Switch to Peat-Free Seed Starting Mixes
Peatlands are incredible ecosystems that store vast amounts of carbon, regulate water flows, and support unique wildlife. When we harvest peat moss for horticultural use, we destroy these ancient bogs, releasing massive amounts of greenhouse gases into the atmosphere. Transitioning to peat-free seed starting mixes is one of the most impactful decisions a gardener can make to protect the planet.
Beyond the environmental benefits, organic peat-free mediums are often superior for raising young plants. They offer an ideal structural balance that encourages faster, healthier seed germination. By utilizing renewable resources, these sustainable alternatives provide excellent aeration and natural biological activity, giving delicate seedlings the absolute best start in life.
Essential Ingredients for DIY Peat-Free Mediums
Creating your own custom seed-starting mix is straightforward once you understand the key components. Each organic ingredient plays a specific role in balancing moisture retention and structural aeration.
- Coconut Coir: Made from the husks of coconuts, coir is a renewable resource that holds up to ten times its weight in water while maintaining excellent air space.
- Well-Aged Compost: Provides a gentle, slow-release source of organic nutrients and introduces beneficial microbes that protect vulnerable seedlings.
- Leaf Mold: Created from decomposed deciduous leaves, this crumbly material mimics the forest floor, holding moisture beautifully and encouraging strong root growth.
- Perlite: This volcanic glass expands when heated, creating lightweight, sterile granules that prevent compaction and optimize drainage.
- Vermiculite: A hydrated laminar mineral that excels at retaining both water and soluble nutrients, keeping the root zone consistently hydrated.
Recipe 1: The Ultimate Coco Coir and Perlite Starter Blend
A Lightweight Mix for Delicate Seeds
This ultra-lightweight, fast-draining blend is designed specifically for small, delicate seeds that require easy root penetration and protection from waterlogging.
- Measure out two parts of pre-hydrated coconut coir into a large mixing bucket.
- Add one part of horticultural-grade perlite to ensure optimal aeration.
- Incorporate half a part of finely screened worm castings to provide a gentle, non-burning nutrient boost.
- Blend the ingredients thoroughly until the mixture is uniform and crumbly.
- Slightly moisten the mix before filling your seed flats or plug trays.
Recipe 2: The Nutrient-Rich Compost and Leaf Mold Blend
A Robust Option for Larger Seeds
Larger seeds, such as squash, beans, and sunflowers, possess more energy reserves and benefit from immediate access to mild, natural nutrients as they emerge.
- Sift garden compost through a quarter-inch mesh screen to remove any large, undecomposed debris.
- Combine two parts of this sieved compost with two parts of well-rotted leaf mold.
- Add one part of coarse agricultural sand to improve structural weight and facilitate rapid drainage.
- Mix the components thoroughly, breaking up any remaining clumps.
- Test the moisture level by squeezing a handful; it should hold its shape without dripping.
Recipe 3: The Moisture-Retaining Wood Fiber and Vermiculite Mix
High-Humidity Blend for Stubborn Seeds
Some seeds require extended periods of high humidity to soften their seed coats and break dormancy. This blend relies on stable wood fibers and vermiculite to hold moisture without suffocating the roots.
- Combine three parts of finely ground, composted wood fiber as your primary structural base.
- Add one part of medium-grade vermiculite to draw in and slowly release moisture to the seeds.
- Mix in a light dusting of kelp meal, aiming for roughly one tablespoon per gallon of mix, to supply trace minerals.
- Thoroughly blend the ingredients to distribute the fine kelp meal evenly throughout the medium.
- Hydrate the mix fully, allowing the wood fibers and vermiculite to saturate before sowing.
Natural Germination Boosters to Add to Your Mix
While a basic structural medium will support physical growth, adding organic inoculants can dramatically accelerate development and build resilient root systems.
- Mycorrhizal Fungi: These beneficial fungi form a symbiotic relationship with seedling roots, vastly expanding their reach to absorb water and nutrients.
- Kelp Meal: Packed with growth hormones and trace minerals, kelp meal stimulates cellular division and eases early root development.
- Willow Water: Naturally rich in salicylic acid and rooting hormones, using willow water for your initial watering stimulates rapid cellular response and root initiation.
How to Properly Prepare and Sterilize Your DIY Medium
Damping-off is a common fungal disease that can destroy an entire tray of young seedlings overnight. Properly preparing and pasteurizing your ingredients eliminates pathogens while safeguarding beneficial microflora.
- Place your compressed coconut coir brick in a large bucket and pour warm water over it, allowing it to expand fully over thirty minutes.
- Spread your sifted garden compost or leaf mold onto a baking sheet in a layer about two inches deep.
- Bake the compost in an oven preheated to 180 degrees Fahrenheit until the internal temperature of the organic material reaches 140 degrees.
- Maintain this temperature for exactly thirty minutes to kill weed seeds and harmful fungi without destroying all beneficial bacteria.
- Allow all heated materials to cool completely to room temperature before blending them into your final seed-starting mix.
Best Watering Practices for Peat-Free Seedlings
Watering peat-free seed starting mixes requires a slightly different approach than working with traditional peat. Peat-free alternatives, particularly those rich in coconut coir or wood fiber, tend to dry out more quickly on the top surface while remaining damp underneath. This can mislead gardeners into overwatering, which leads to root rot.
To avoid this issue, always rely on bottom-watering. Place your seedling trays in a shallow reservoir of water for ten to fifteen minutes, allowing the medium to draw moisture upward through capillary action. Always perform a physical moisture test by lifting the tray; if it feels light, it is time to water, but if it feels heavy, let it rest.
Troubleshooting Common Germination Failures
Addressing Mold and Fungal Growth
A fuzzy white layer on the soil surface indicates poor air circulation and excessive humidity.
- Increase airflow around your trays using a gentle fan.
- Dust the surface of the medium with cinnamon, a natural antifungal agent.
- Reduce watering frequency, letting the top layer dry out slightly.
Correcting Slow Germination and Leggy Seedlings
When seeds take too long to sprout or grow tall, thin, and weak, environmental adjustments are necessary.
- Move leggy seedlings closer to your artificial light source or to a brighter window.
- Utilize a heating mat to elevate soil temperatures and speed up slow-to-germinate species.
- Thin out crowded seedlings to reduce competition for light and nutrients.
Transitioning Your Germinated Seedlings to the Garden
Once your seedlings have developed strong roots and their first set of true leaves, they must be prepared for the outdoor environment. Seedlings grown in highly porous peat-free mediums develop robust root systems, but they are still susceptible to environmental shock if moved too quickly.
Begin the hardening-off process by placing your trays outdoors in a sheltered, shady location for a few hours each day. Over the course of a week, gradually increase their exposure to direct sunlight and wind. When transplanting, ensure the garden soil is thoroughly moist, and plant them during a cloudy day or in the late afternoon to guarantee a smooth transition with minimal transplant shock.
Summary
This article explores sustainable, organic, and peat-free seed starting medium recipes designed to accelerate plant germination while protecting fragile wetland ecosystems. Traditional peat moss, though highly popular in horticulture, is harvested in an environmentally destructive manner. As eco-friendly alternatives, the guide highlights renewable ingredients like coconut coir, high-quality compost, leaf mold, perlite, and vermiculite.
By combining these components, gardeners can create a lightweight, well-draining, and nutrient-rich environment that retains optimal moisture and promotes healthy root development. The article provides easy-to-follow DIY recipes tailored for various seed types, emphasizing that a balanced, airy soil structure is key to rapid sprout times. Ultimately, transitioning to these peat-free mixes allows gardeners to foster strong, vibrant seedlings while supporting global conservation efforts.
Leave a comment