
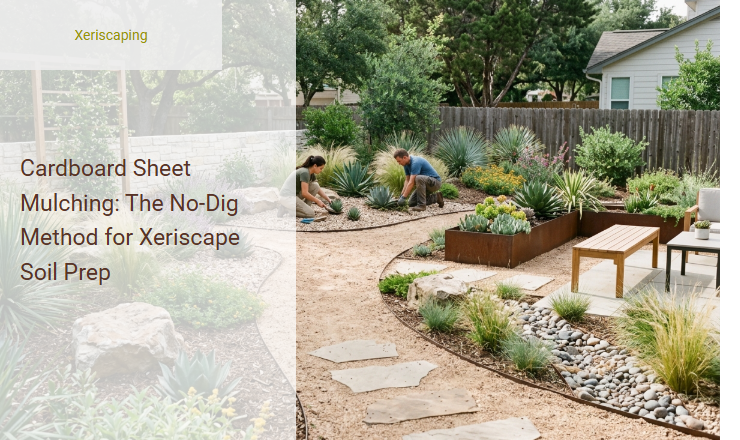
Preparing compacted, weed-choked soil for a low-water landscape often means days of backbreaking digging and sod removal. While traditional excavation is the standard go-to, these disruptive tilling methods actually destroy delicate soil biology and coax dormant weed seeds to the surface. Transitioning instead to cardboard sheet mulching grants you a highly fertile, moisture-retentive planting bed with virtually no physical labor.
As a stipulation, this biological process requires patience, as the organic layers typically need several months to fully decompose. However, the long-term results are undeniable; this method reliably suffocates aggressive invaders like Bermuda grass while cultivating a rich, active network of earthworms underneath.
In this guide, we will outline the step-by-step process of sourcing clean materials, layering organic matter, and timing your planting for ultimate xeriscape success.
Read also: Sheet Mulching vs Till Farming for Soil Enrichment
Introduction to Sheet Mulching for Xeriscapes
Cardboard sheet mulching serves as the ultimate foundation for low-water xeriscaping. This innovative no-dig method allows gardeners to build rich, fertile soil on top of existing ground without disturbing the earth beneath. By eliminating the need to till, this technique suppresses weeds naturally while creating a highly receptive canvas for drought-tolerant native plants in dry climates.
The Science Behind No-Dig Soil Preparation
Leaving the soil undisturbed preserves vital mycorrhizal networks that transport water and nutrients to thirsty plants. In arid regions, tilling destroys this delicate underground infrastructure, leading to rapid moisture loss and erosion.
By avoiding tilling, the soil retains its natural structure, allowing deep moisture to remain trapped where plants need it most.
Essential Materials for Your Sheet Mulch Project
To begin your xeriscape sheet mulching project, you will need to gather several key materials that aid in water retention and soil building:
Non-waxed cardboardto act as the primary weed barrierCompostto introduce beneficial microbesGreen wastesuch as grass clippings for nitrogenNative organic mulchlike wood chips or bark
Step 1: Ground Preparation and Knocking Down Weeds
Prepare your site properly to ensure the cardboard barrier sits flat and starts decomposing effectively.
- Cut down tall weeds and grasses to ground level using a weed trimmer, but leave the root systems intact to serve as future organic matter.
- Thoroughly saturate the dry soil with water to ensure deep moisture penetrates before laying down the protective barrier.
Step 2: Laying the Cardboard Suppressive Barrier
The cardboard layer acts as a physical shield against weed growth while holding moisture in the soil below.

Step 3: Layering Green and Brown Organic Matter
Building a "lasagna" of organic matter over the cardboard fuels soil biology and improves water-holding capacity.
| Layer Type | Common Materials | Primary Function |
|---|---|---|
| Green (Nitrogen) | Fresh grass, manure, compost | Feeds soil microbes |
| Brown (Carbon) | Straw, fallen leaves, cardboard | Builds soil structure |
Step 4: Applying the Final Xeriscape Mulch
A thick top layer of xeriscape mulch completes the system by protecting the underlying layers from the harsh sun. Drought-tolerant options like wood chips, bark, or gravel are ideal choices. This final layer prevents evaporation and gives the garden a clean, beautiful xeriscape aesthetic.
Managing Water and Monitoring Decomposition
During the initial weeks, monitor the moisture levels of your sheet mulch closely. Regular, light watering helps the materials settle and accelerates decomposition. Over time, the cardboard slowly breaks down, converting hard, compacted dirt into a spongy, highly moisture-retaining soil ready to support desert life.
How to Plant Directly Into Your Sheet Mulch
You do not need to wait for the sheet mulch to fully decompose before adding your favorite dry-climate flora.
- Clear away the top mulch layer to locate the cardboard base.
- Cut an "X" shaped slit through the cardboard using a utility knife.
- Dig a small planting hole directly into the soil beneath, insert your succulent or low-water perennial, and tuck the mulch back around the base.
Long-Term Soil Benefits and Maintenance
This low-maintenance approach results in exceptional soil health and dramatic water savings over time. To keep the system functioning beautifully, simply top up the native organic mulch every few years to suppress any opportunistic weeds. For more detailed guides on dry-climate gardening, visit our water conservation resource page.
Summary
Cardboard sheet mulching, often called "lasagna gardening," is an efficient, eco-friendly, and no-dig method for preparing soil for a xeriscape landscape. This technique involves laying overlapping layers of plain cardboard directly over existing turf or weeds, which is then topped with organic materials like compost and wood mulch.
As these layers decompose, they suppress weed growth, conserve essential soil moisture, and foster a diverse ecosystem of beneficial soil microbes and earthworms without the disruptive effects of tilling. For xeriscaping, sheet mulching is an invaluable preparatory step; it transforms compacted, nutrient-poor ground into a fertile, spongy substrate that retains water efficiently.
Ultimately, this sustainable method saves labor, repurposes household waste, and establishes an optimal, nutrient-rich foundation where drought-tolerant plants can thrive, making it an ideal choice for water-wise gardeners looking to transition away from traditional lawns.
Leave a comment