
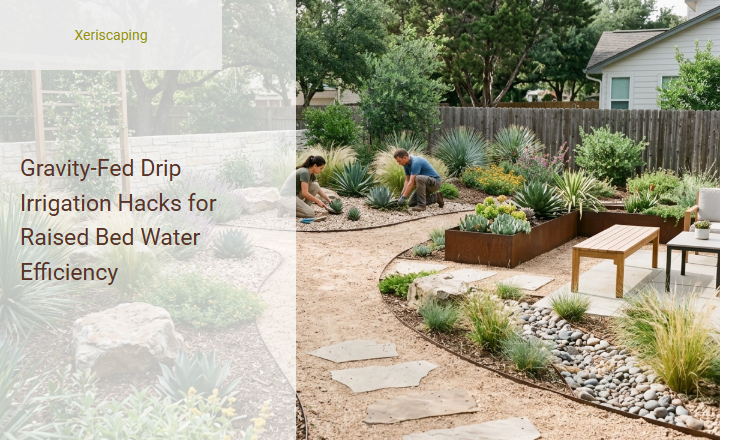
Managing consistent moisture in raised garden beds is a perpetual struggle, often resulting in uneven watering, dry root zones, and inflated utility bills. Before implementing a solution, it is vital to understand that traditional irrigation relies on high municipal pressure, whereas gravity-fed systems must operate within the strict limits of low-pressure hydraulics. Mastering this passive approach grants you complete, off-grid water efficiency and healthier, deeper-rooted crops without relying on expensive pumps. However, optimizing these systems requires a foundational understanding: gravity-fed setups are not plug-and-play and demand precise elevation and flow calculations. Utilizing specific components, such as 1/2-inch main distribution lines combined with specialized low-PSI turbulent-flow emitters, serves as concrete proof that even minimal head pressure can deliver highly targeted hydration. In this article, we will explore key calibration hacks, filtration techniques, and distribution layouts to transform your raised bed watering efficiency.
Read also: Drip Emitters vs Bubblers for Shrub Irrigation
Introduction to Gravity-Fed Raised Bed Irrigation
Cultivating a thriving garden in raised beds requires a reliable, efficient watering strategy. Traditional watering methods often lead to excessive evaporation, runoff, and uneven moisture distribution. Utilizing a gravity-fed drip irrigation system offers a highly sustainable solution that works in harmony with nature. By relying on the natural force of gravity, this method ensures optimal water conservation by delivering moisture directly to the plant roots, minimizing waste.
In addition to environmental benefits, gravity-powered systems deliver significant cost savings. Because they operate without the need for high-pressure household water lines or expensive electric pumps, your utility bills remain low. Plants thrive under this setup; the slow, consistent deep-watering action prevents soil compaction and reduces the risk of foliar diseases, promoting robust, healthy root development in your raised beds.
The Physics of Gravity Flow: Elevation and Pressure
Operating a successful drip system without a pump requires a basic understanding of fluid dynamics. Water pressure in a gravity system is entirely determined by the height of the water column, a concept known as head pressure. Every foot of elevation rise creates approximately 0.433 pounds per square inch (PSI) of pressure. To operate low-pressure drip components effectively, you must establish sufficient vertical lift between the bottom of your water reservoir and the top surface of your raised beds.
Calculating Your Minimum Reservoir Height
Most low-pressure irrigation components require at least 2 to 5 PSI to function consistently. To achieve a target pressure of 3 PSI, your water level must sit at least 7 feet above the height of your garden beds. Elevating your rain barrel or IBC tote on a sturdy platform ensures the water has enough gravitational potential energy to overcome the physical resistance of the supply lines, delivering a steady flow to your plants.
Optimizing Tubing Size for Low-Pressure Systems
In high-pressure municipal systems, water easily overcomes the internal friction of narrow pipes. In a low-pressure gravity setup, however, friction loss is your greatest enemy. Standardizing on larger diameter mainlines is crucial to preserving the limited head pressure generated by your elevated reservoir.
- Use a 1/2-inch Mainline: A 1/2-inch polyethylene tube allows a much larger volume of water to flow with minimal resistance, ensuring that pressure does not drop off drastically before reaching the end of the line.
- Select the Right Distribution Tubing: Keep 1/4-inch micro-tubing runs as short as possible-ideally under 12 inches per outlet-to prevent friction from choking off the flow to individual plants.
- Minimize Fittings: Every elbow, tee, and valve introduces turbulent flow and pressure loss. Keep your layout as straight and streamlined as possible.
Selecting the Best Low-Pressure Emitters
Standard drip system emitters are designed to operate at pressures between 15 and 45 PSI. These pressure-compensating (PC) emitters utilize a flexible internal diaphragm that restricts water flow until a specific high-pressure threshold is met. In a gravity-fed system, pressure-compensating emitters will fail to open, resulting in zero water flow.
Choosing Non-Compensating and Micro-Flow Emitters
To ensure consistent hydration, you must install non-compensating emitters, which feature wider, open flow paths that let water pass freely even at incredibly low pressures. Alternatively, drip tape designed for low-pressure applications or laser-drilled emitter tubing works exceptionally well, as they rely on simple physical orifices rather than complex internal valves to distribute water evenly across your raised beds.
Upgrading Your Water Reservoir
A reliable gravity system begins with an efficient, high-volume water storage setup. Standard 55-gallon rain barrels or 275-gallon Intermediate Bulk Containers (IBC totes) serve as excellent reservoirs for harvesting rainwater or holding clean well water.
- Construct a heavy-duty elevation platform using concrete blocks or pressure-treated lumber to support the immense weight of the water.
- Install a high-flow bulkhead fitting near the bottom of the container to prevent flow restrictions at the exit point.
- Connect a full-port brass ball valve to the bulkhead to allow maximum water passage without the internal narrowing found in standard garden spigots.
Essential Filtration Hacks to Stop Clogging
Because gravity-fed systems use non-compensating emitters with open pathways, they are highly susceptible to clogging from algae, sediment, and organic debris found in harvested rainwater. Without proper filtration, tiny particles will quickly block your emitters, causing localized dry spots in your raised beds.
To protect your system, install a low-pressure mesh or disc filter immediately downstream of your reservoir's main shut-off valve. A 120-mesh (130-micron) filter is highly recommended, as it captures fine particulates without significantly restricting the gravity-driven flow of your water supply.
Layout Hacks: Loop Designs for Equal Distribution
In a standard linear, dead-end irrigation layout, the emitters closest to the water source receive the highest pressure, while the emitters at the far end suffer from reduced flow. You can easily solve this pressure drop by altering your layout geometry.
The Power of the Closed-Loop System
Instead of capping the end of your 1/2-inch mainline, route it completely around the perimeter of your raised beds and connect it back into itself using a tee fitting at the source. This creates a continuous, closed loop.
- Water enters the loop from two directions simultaneously, equalizing the pressure.
- Flow rates remain uniform across all emitters, regardless of their distance from the reservoir.
- The risk of airlocks within the tubing is significantly reduced.
Automating with Zero-Pressure Water Timers
Automation makes gravity-fed watering truly hands-free, but standard digital watering timers require a minimum municipal line pressure (often 15 to 20 PSI) to push the internal diaphragm open. To automate a gravity system, you must source a specialized battery-operated, motorized ball-valve timer.
These specialized timers feature an internal motor that physically rotates a solid ball valve to an open position, allowing water to flow through a completely unobstructed pathway. Since they require zero pressure to operate, they will reliably open and close on your programmed schedule, ensuring your raised beds receive consistent hydration even when you are away.
Synergizing Irrigation with Soil and Mulch Hacks
Installing a gravity-fed drip system is only half of the water conservation equation. To maximize the efficiency of every drop, you must optimize the soil environment within your raised beds to retain moisture.
Building Water-Retentive Soil Structures
Incorporate generous amounts of organic compost and coconut coir into your raised bed soil mix. These organic materials act like natural sponges, absorbing water from the drip emitters and holding it within the root zone. To prevent evaporation, always cover the soil surface with a 2- to 3-inch layer of clean organic mulch, such as straw or shredded leaves, keeping the underlying soil cool and consistently moist.
Troubleshooting and Maintenance for Peak Efficiency
Routine upkeep prevents common system failures and extends the lifespan of your low-pressure irrigation setup. Keep your gravity-fed system running smoothly with this seasonal checklist:
- Flush the Lines: Open the end caps of your mainlines once a month to flush out any fine silt that accumulated past the filter.
- Clean the Filter: Inspect and rinse the internal mesh or disc filter element regularly, especially during mid-summer algae blooms.
- Check for Air Locks: If water stops flowing, lift the lines to purge trapped air bubbles that can block low-pressure water movement.
- Winterize the System: Drain all tubing, timers, and filters before the first hard freeze to prevent ice expansion from cracking the plastic components.
Summary
Gravity-fed drip irrigation offers an eco-friendly and highly efficient way to water raised garden beds without relying on pressurized municipal water or electricity. To maximize system performance, several key hacks can be implemented. First, elevating the water reservoir-such as a rain barrel-by at least two to three feet creates the necessary pressure head. Utilizing specialized low-pressure drip lines or porous emitter-free tubing prevents the clogging common in standard systems. Additionally, installing a high-quality mesh filter is crucial for keeping organic debris out of the delicate lines, while integrating a zero-pressure battery-operated timer ensures hands-free automation. By directing water straight to the root zone, these gravity-fed hacks drastically reduce evaporation, prevent weed growth, and boost overall water efficiency in any backyard garden.
Leave a comment