
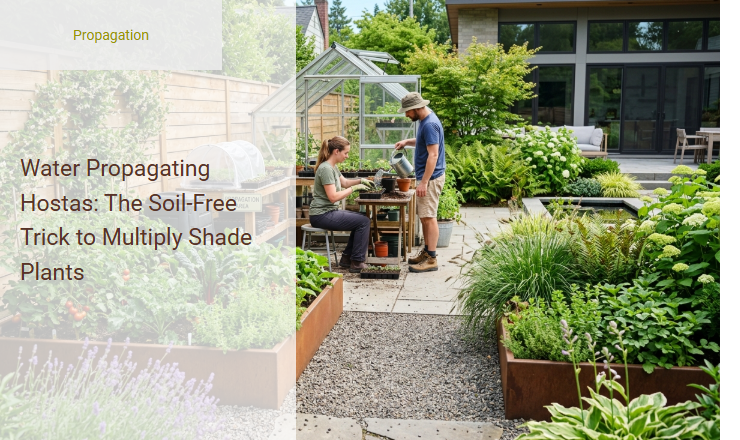
Expanding a lush shade garden can be a slow, expensive endeavor, especially when traditional division methods result in transplant shock or root rot. While most gardeners rely on conventional soil mixes to establish new starts, the dense, moisture-retaining nature of dirt often suffocates delicate new root systems before they can fully form.
Fortunately, water propagation bypasses these soil-borne risks entirely, granting you a highly visual, mess-free method to multiply your shade collection for free. To ensure success, however, there is one critical stipulation: you must propagate using a division that includes a piece of the parent plant's crown, as isolated leaves will not generate new root systems. This soil-free technique yields rapid results for popular cultivars like 'Patriot' and 'Halcyon', which quickly develop robust water-roots. Below, we outline the exact step-by-step process to transition your hostas to water, manage their growth, and safely replant them.
Read also: Seed Sowing vs Division for Hostas
Introduction: The Magic of Water Propagating Hostas
Hostas are the undisputed royalty of the shade garden, loved for their lush, variegated foliage and reliable growth. While most gardeners rely on traditional division to multiply these leafy beauties, water propagation offers a fascinating, soil-free alternative that is both simple and highly rewarding. By stripping away the dirt and placing your hosta divisions directly into water, you can easily monitor root development and expand your shade-loving collection without the heavy lifting of traditional planting.
Why Choose the Soil-Free Trick?
Choosing to propagate hostas in water instead of placing divisions straight back into the dirt offers several distinct advantages for both novice and experienced gardeners:
- Visual Progress: A transparent container lets you observe new root growth in real-time, removing the guesswork from the rooting process.
- Reduced Transplant Shock: Transitioning a division into water allows it to hydrate thoroughly and establish new, resilient root structures before facing the harsh elements of outdoor soil.
- Pest and Disease Prevention: Starting your plants in clean water eliminates soil-borne pathogens, fungal spores, and underground pests that often target newly split crowns.
The Best Time to Propagate Hostas
Timing is everything when it comes to successfully propagating hostas. The absolute best time to take divisions is during the early spring, just as the new shoots-often called "pips"-begin to push through the soil. At this stage, the plant is bursting with active growth energy but has not yet fully expanded its large, moisture-demanding leaves.
Alternatively, you can propagate hostas in the early autumn, when the summer heat has subsided and the plant begins preparing for dormancy. Avoid propagating during the peak of summer, as extreme heat and dry air place excessive stress on the parent plant and the newly separated divisions.
Essential Tools and Materials
One of the greatest benefits of this soil-free method is that it requires very little equipment. Before you begin, gather these simple household items:
- Clean Glass Containers: Transparent vases, jars, or wide-mouthed bottles work best so you can easily monitor the water level and root health.
- Fresh Water: Use filtered tap water, rainwater, or distilled water at room temperature.
- Sharp Pruning Shears: A sterilized garden knife or bypass pruners will ensure clean cuts that heal quickly.
Step 1: Selecting and Dividing the Parent Hosta
Choosing the Perfect Candidate
For the best chance of success, select a mature, healthy, and vigorous hosta plant from your garden that has at least three or four distinct clumps of leaves.
- Gently dig around the perimeter of the parent plant to loosen the soil and lift the root ball.
- Identify a healthy outer clump, or "pip," that has its own set of stems and roots.
- Use your sharp, sterilized shears to slice clean down through the crown, separating the division from the main plant.
Step 2: Cleaning the Soil Off the Roots
The Importance of a Clean Start
Once you have separated your hosta division, you must remove all traces of garden soil from the root system. Any dirt left behind on the roots will quickly dissolve in the water container, creating a breeding ground for harmful bacteria, fungi, and root rot.
Take the division to an outdoor hose or a sink and gently rinse the roots under cool, running water. Use your fingers to carefully untangle the root mass and wash away stubborn mud clumps. Continue rinsing until the roots are completely clean and the water runs crystal clear.
Step 3: Placing the Hosta Division in Water
Setting Up the Propagation Vessel
With your clean division ready, it is time to transition it to its temporary aquatic home. Fill your clean glass container with fresh, room-temperature water.
Gently lower the hosta's roots into the water, ensuring that only the root system is submerged. It is crucial to keep the crown (the point where the stems meet the roots) entirely above the water line. If the crown is submerged, it will quickly succumb to rot, ruining the propagation attempt. You can balance the plant on the rim of the jar or use small pebbles to keep it suspended.
Maintenance: Keeping the Water and Roots Healthy
To ensure your hosta thrives, place the container in a spot that receives bright, indirect sunlight. Avoid direct sunlight, which can overheat the water and encourage rapid algae growth. Keep the setup in a room with stable temperatures, away from cold drafts or heating vents.
When and How to Transplant into the Garden
After a few weeks, you will notice vibrant white roots sprouting from the base of the hosta division. Your hosta is ready to transition to the garden once these water-grown roots are at least two to three inches long.
- Choose a shady or partially shaded spot in your garden with well-draining, organic-rich soil.
- Dig a hole twice as wide as the root system and gently spread the delicate white roots out into the hole.
- Fill in the hole with soil, keeping the crown level with the soil surface, and press down lightly.
- Water the newly planted hosta thoroughly and keep the soil consistently moist for the first two weeks as it acclimates to its permanent home.
Troubleshooting Common Water Propagation Issues
While water propagating hostas is highly successful, you may encounter occasional issues:
If you notice the water turning green, this is due to algae growth caused by too much direct sunlight. Simply wash the container, rinse the roots, and move the plant to a spot with softer, indirect light.
If the roots become mushy, brown, or emit an unpleasant odor, root rot has set in. Cut away the damaged, mushy roots with sterilized shears, wash the container thoroughly, and change the water more frequently to keep oxygen levels high.
Summary
This article explores an easy, soil-free method to multiply your favorite shade plants through water propagation. While hostas are traditionally divided and replanted directly into the ground, propagating them in water offers a fascinating and highly successful alternative. The process begins by carefully dividing a mature hosta clump, ensuring each division has a healthy eye or shoot. After thoroughly rinsing the soil from the roots, the division is placed in a container of clean water.
Positioned in indirect sunlight, the hosta rapidly develops a robust, clean root system. This method allows gardeners to easily monitor root growth and health before transplanting the new clones back into the garden or into pots. Perfect for both beginners and experienced gardeners, water propagation is a budget-friendly and mess-free trick to effortlessly expand your lush, shade-loving foliage.
Leave a comment